You’ve probably used a bar rail, but just didn’t realize it. For a beautiful custom bar, installing a bar rail is an important part of making sure your bar looks professional and finished.
A bar rail is the decorative hardwood edging that borders the bar top on the front of your bar. Your customers or guests can lean up against it, and installing a bar rail gives your bar a polished, finished look that can rival any professionally built bar.
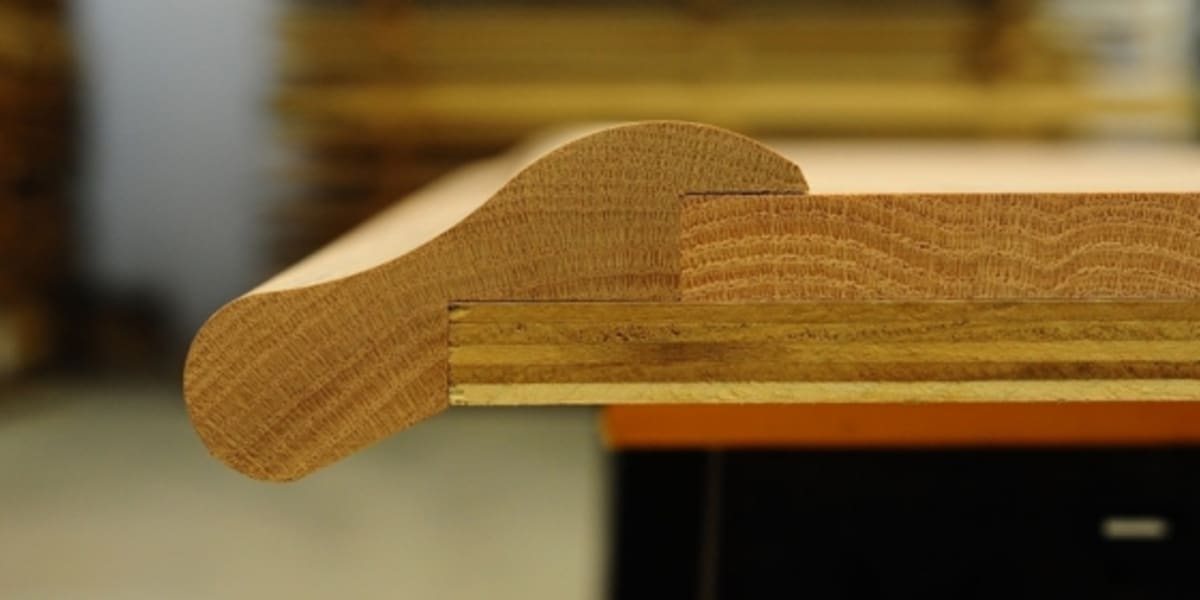
It is made with a curved, slightly sloping construction to provide comfort to guests and prevent glasses and other objects from sliding off the bar top.
High-quality bar rail will have a simple, notched-out rear profile, making it easy to install. At Hardwoods Incorporated, our solid wood bar rail is milled from a single piece of prime grade hardwood lumber. Not only does this construction give a quality finish, it also provides lasting durability and strength to your bar rail.
Different types of hardwood will suit different bar rail uses. For example, if you plan to build an outdoor bar, more weather-resistant hardwoods such as teak or mahogany will provide the longest-lasting bar rail. We offer bar rails in a wide variety of hardwood species, including red oak, cherry, hard maple, black walnut, poplar, and rare species.
The instructions for installing your bar rail are going to depend upon where you got it from. If you bought your bar rail from Hardwoods Incorporated, it’s really easy!
You’ll need a drill, glue, screws, spoil board, biscuit joiner, and biscuits.
>>Watch our bar rail installation video!>>
First, set up your spoil board against your bar subtop to hold the bar rail in position while cutting. Set your miter box angle at 45 degrees and position the bar rail on the spoil board to make the first cut.
Next, reset the miter box to the opposite 45-degree angle and position the other piece of your bar rail for another cut.
After you make both cuts, check the pieces for proper fit and make any adjustments necessary. Next, drill pilot holes into your subtop every 12 inches. If you so choose, you can make a biscuit joint on the bar rail miter for added strength, but this step is not necessary.
Apply glue to the subtop and to the top notch of the bar rail. Brush the glue into a thin layer on the sub top and bar rail for a closer fit. After applying the glue, use clamps with blocking to hold the bar rail in position while it dries.
Finally, using the pilot holes you drilled into the subtop, secure the bar rail to the bar top from underneath with screws. Once you do some light sanding and apply a water-resistant finish, your bar top will be ready to serve your guests all those tasty drinks!
>>Need help finishing your bar rail? Get tips here!>>
At Hardwoods Incorporated, we offer only the highest-quality bar rails and bar building parts in a variety of hardwood species, made in our workshop in central Maryland. We want to make sure you have the best possible experience building your own bar, so we have compiled some helpful bar-building resources for you to reference. Or, if you want extra help, reach out to us and we’re happy to help during normal business hours!
OFFER EXCLUDES: TAXES, SHIPPING, WALL BARS, and CLOSEOUTS & SPECIALS. OFFER VALID AT TIME OF PURCHASE ONLY.
Offer Valid
November 10, 2025
thru November 30, 2025
Use Code: NOV10OFF
OFFER EXCLUDES: TAXES, SHIPPING, WALL BARS, and CLOSEOUTS & SPECIALS. OFFER VALID AT TIME OF PURCHASE ONLY.